Take a look in our Manufacturing page for full details of all core sepcifications that we can provide
Frequently Asked Questions
Below are a selection of questions and topics we are regularly asked about by our customers.
We can't cover everything here, so if you have any further questions about our product range or capabilities simply contact our sales team
Take a look in our Manufacturing page for full details of all header plates that we can provide

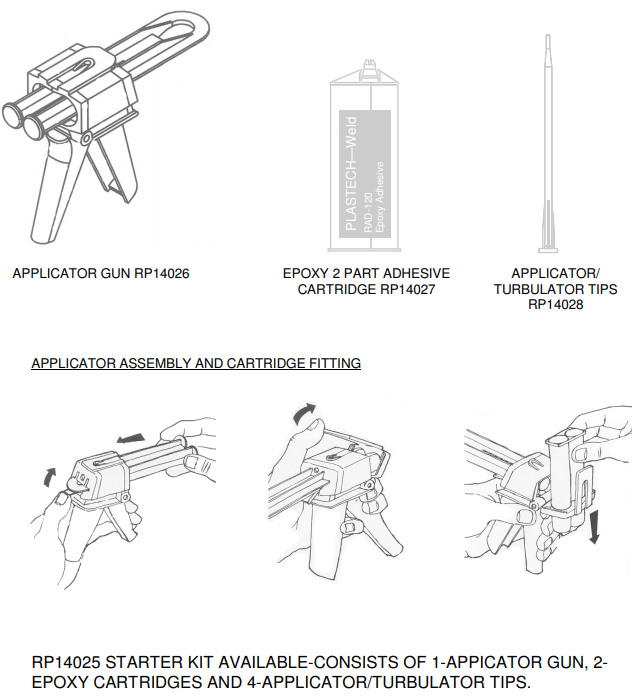
Remove the sealing cap from the two-part Epoxy cartridge
and squeeze a little of the Epoxy out.
This will ensure that
both cylinders of the cartridge are operating and any air
locks are cleared.
If the ambient temperature is very low or
the Epoxy is too viscous to squeeze out, replace the cap
and immerse the cartridge in a container of hot water for 10-
15 minutes.
Please note, the plunger of the applicator gun is
made of plastic and is actuated by a metal cam inside the
applicator. Pulling the trigger repeatedly when the Epoxy is
too viscous or if there is a blockage will result in damage to
the gun or splitting of the cartridge.
Before applying the Epoxy, the repair area should be keyed.
This can be achieved by scoring the surface with a file or
rough sandpaper. Use a solvent to remove all traces of dirt,
grease and oil. Unless the repair area is spotlessly clean,
the repair will be ineffective.
The Epoxy should cure in approximately 4 hrs, however this
time can be reduced by warming the repair with a heat gun.
If the Epoxy starts to crystallise, the temperature is too high.
It may be advisable to practice the technique first to determine the optimum temperature required when using different equipment.
A new turbulator tip (RP14028) MUST be used every time
you apply the Epoxy. It is therefore advisable, where practical, to carry out several repairs in order to minimise waste.
Always remove and discard the turbulator tip after use and
securely refit the sealing cap.

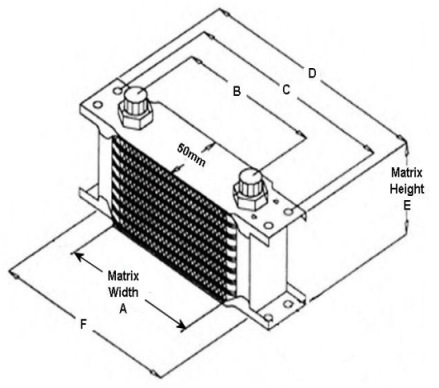
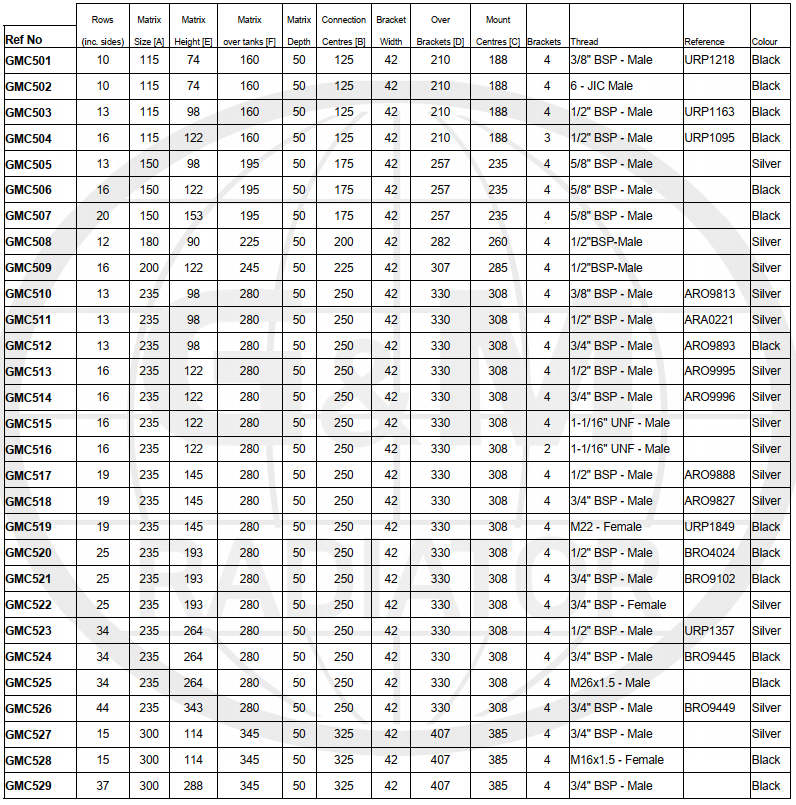
Multi use fluid coolers. Various sizes and thread types available. Max working pressure 1300 kpa (188psi)

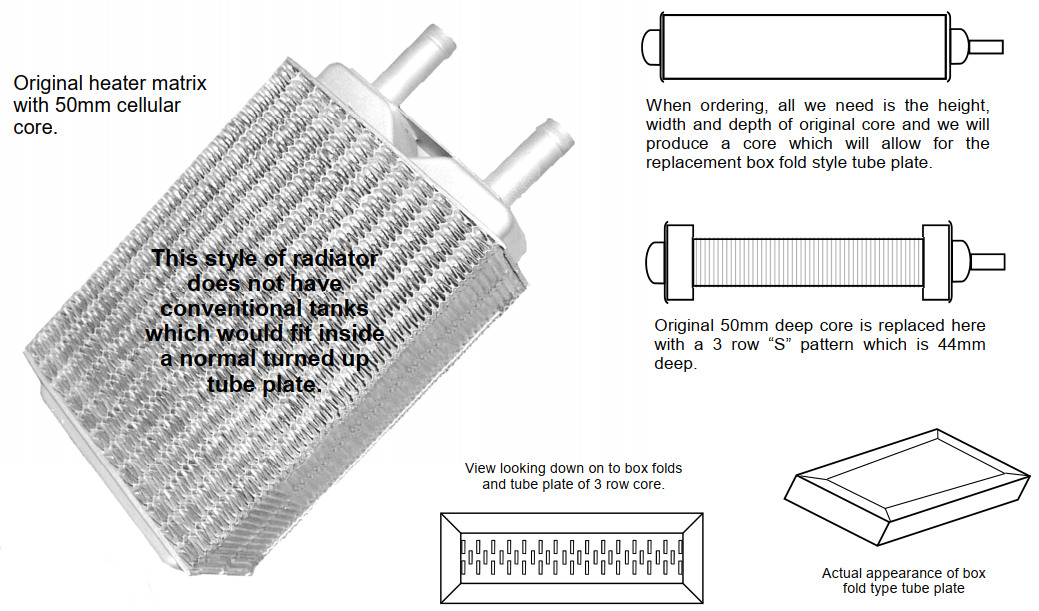
Replacement Cores for Cellular Vintage Style Radiators and Heaters

Using the Website
Below you'll find some short video tutorials on how to use some of the features on our new website.
All manufactured jobs built in our factory are fully tracked from start to finish.
You can track the progress of your outstaning jobs in the "Order History" screen, as shown below...
You can track parcels for your recent orders in the "Order History" screen.
Note that this only works for parcels sent by our usual TNT carrier. If you have requested a different service, tracking information can be obtained
from our Sales Team.
See the how-to video below...
You can set up additional shipment addresses in your online account in the "My Account" page.
This allows you to easily select an alternative shipment address while ordering online.
Here are some examples of the many ways you can use our catalogue to search for products.
You can click on any of these examples to see the results:
Search by OEM (Original Equipment Manufacturer number)

(You can search by OEM, partial OEM, or another supplier's cross reference number)
Search for a Komatsu Radiator

Search for any products with sizes 1085 high by 1031 wide by 114 deep

(Sizes don't need to be exact. We'll also show you results that are close to the size you enter)
Search for a CORE that is 1085 high, any width

(The * character matches any width)
Search for a Bearward Section

Search for any FIAT products 295 high by 202 wide

Search for a core with header PLATES size 448 by 109

You can also use * to search for plates with any width, e.g. PLATES 448 x *